My inspiration for this Spring project came from my buddy, Karianne over at Thistlewood Farm. I adore everything about her, her blog and her style, but what really hooked me was her easy peasy burlap vase project. Since falling for her wrap, I have started a "border line" obsession with a few wraps of my own.
I did this one for my mantel

I did this one for a gift

I did this one for my Daffodils that you can read about here

The idea of something that looks pretty and is a cool way to conceal the flower stems that have been sitting in water a little to long, just works for me.
To add to my collection, here are two that I made for Easter that I wanted to show you how to make.
To add to my collection, here are two that I made for Easter that I wanted to show you how to make.

Vase #1

Vase #2
To make these wraps you will need:
- glass vase
- Choice of fabric for the wrap. For my larger vase ( vase #1) I used cream colored muslin. For my smaller vase ( vase #2) I used cream color burlap
- Velcro
- fabric for the bunny ( or whatever image you use)
- Fusible Web or liquid Stitch to secure your image to the wrap
- burlap for the tail, eyes and ear
1) Measure the circumference of your vase and add about 1/2 inch to both sides. You will also need to determine how tall you want the wrap to be, add 1/2 inch to these sides as well.


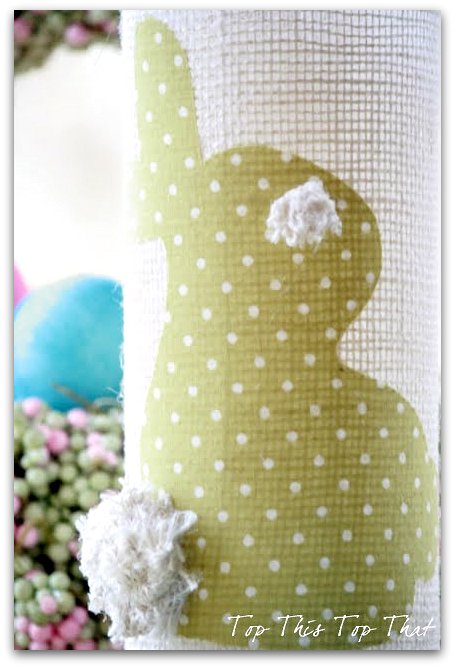
6) For the eyes, ear and tail I used cream burlap. For the tail and eye , I made rosette flowers ( big and small) and secured with hot glue. For the ears, I simply twisted a small piece of the burlap and secured on with hot glue.


Sweet ugh?

Perhaps you will start a collection of your own?

Sharing the wrap at

0 comments:
Post a Comment